Our pet bees moved in the second week of May, during out first heat wave. They didn't take the trip well and the beekeepers informed us that likely only half of the queens will survive. When they arrived one evening with their truck parked in front of our house, in their full bee suits, while carrying buzzing boxes with thousands of bees swarming around them into our backyard, there were a few not-so-pleasant looks from the neighbors. I thought I would be fielding some tense calls that evening! We did not have any problems, no complaints, no stings for the first month. I was feeling quite comfortable with them.
A couple weeks ago the bee keepers came out to remove the feeder boxes and "agitated" one of the hives. One of the bee keepers got stung 10 times. They told use to stay out of the backyard for the day and they should calm down. Within an hour the next door neighbor was knocking on our door asking if we still had bees. UGH! They went out to swim in their pool and bees started diving into their heads. No stings, thank goodness. I contacted the bee keepers and it was good to know that they are willing to take the hives away immediately.
They have calmed down and have not been bothering anyone, but I have become fearful of their buzzing. I've never been stung. How bad is it, really?
links; Tempt My Tummy Tuesday, Traditional Tuesdays, Works For Me Wednesday, Real Food Wednesday
Tuesday, June 28, 2011
Thursday, June 23, 2011
Garden Journal 2011 {Blackberries}
This lil' guy dropped my camera on it's lens and few months ago, so I was using my camera phone for a few weeks until it was replaced. This picture cracks me up because of two things; first, he's inner struggle is apparent as his brothers yell at him that he is not allowed to pick the berries while his mom is taking a picture of him all while trying not to get poked! Second, the rakes stuck in the bush in attempt to hold them up. I staked the bushes really well in March, but by the end of April they were out of control. This is amusing to me because just last year we had nothing but a stick that produced 2 berries (last picture in that post).
Now, blackberries are no fun to trim. I lived with thorns in my fingers for a few weeks, everyday I would curse them when I bumped the thorn just right and it hurt like the dickens. This fall they are going to need loads more trimming than I did this year, not looking forward to it. There has got to be some puncture resistant gloves that go past the elbows. I learned that they are basically weeds, they grow runners underground and pop up in random places. These are what we dug up from my in laws and planted just over one year ago. They stayed green all year long, through the long, miserable heat and the hard freezes.
I was very happy with the production this year. I would estimate that I brought in around 10 lbs over the 6 weeks they were in production. We learned early on that they need to stay on days past turning from red to black, or they were way too sour. When left to fully ripen, they were soft and plump and juicy and would release easily from the plant. If it was half eaten, those were the best of the best. Birds have good taste in food, though the black berries were one of the few things in the garden this year that they left us our fair share.
link; Simple Lives Thursday, Things I Love Thursday, Pennywise Platter Thursday, Fightback Friday, Finer Things Friday, Frugal Friday, Foodie Friday, Fresh Bites Friday
Now, blackberries are no fun to trim. I lived with thorns in my fingers for a few weeks, everyday I would curse them when I bumped the thorn just right and it hurt like the dickens. This fall they are going to need loads more trimming than I did this year, not looking forward to it. There has got to be some puncture resistant gloves that go past the elbows. I learned that they are basically weeds, they grow runners underground and pop up in random places. These are what we dug up from my in laws and planted just over one year ago. They stayed green all year long, through the long, miserable heat and the hard freezes.
I was very happy with the production this year. I would estimate that I brought in around 10 lbs over the 6 weeks they were in production. We learned early on that they need to stay on days past turning from red to black, or they were way too sour. When left to fully ripen, they were soft and plump and juicy and would release easily from the plant. If it was half eaten, those were the best of the best. Birds have good taste in food, though the black berries were one of the few things in the garden this year that they left us our fair share.
link; Simple Lives Thursday, Things I Love Thursday, Pennywise Platter Thursday, Fightback Friday, Finer Things Friday, Frugal Friday, Foodie Friday, Fresh Bites Friday
Tuesday, June 21, 2011
Soaked Peanut Butter Oatmeal Breakfast Cake
My grandma never bought sugary cereals for her kids, my mom was so bummed about this that she always knew that her kids were going to have sugary cereal. And we did. Cinnamon Toast Crunch, Cookie Crisp and Peanut Butter Captain Crunch were some of my faves.
While my elementary school had actually served edible food, middle school and high school did not. So when I entered the 7th grade I came home VERY hungry. I had to start eating a more substantial breakfast because I didn't touch the cafeteria lunches. This was 2 packets of flavored instant oatmeal cooked in the microwave with extra sugar.
So I have merged and healthified my favorite morning meals from the past to make this Soaked Peanut Butter Oatmeal. It is has great peanut flavor, is slightly sweet and has a thin crispy crust on top. If I forget to start the oats soaking 24 hours in advanced, I throw in ¼ cup rye flour or flakes to speed the breakdown of antinutrients. This recipe is yummy with any nut butter, make your own with soaked and dehydrated nuts for super nutrition.
3 cups steel cut oats
3 tablespoons whey or lemon juice
3 cups water
1/3 cup sucanat
2 tablespoons butter, melted
1/2 cup peanut butter
2 eggs
3/4 teaspoon salt
2 teaspoons vanilla
3/4 cup milk
Soak oats with water and whey for 24 hours. Place in fine strainer, rinse well and let drip for 5 minutes. Meanwhile, combine sugar, butter and peanut butter, mix well. Beat in eggs, salt and vanilla. Carefully thin out with milk, mix in strained oats and pour into a 9 by 13 baking dish, spread evenly and bake at 350 degrees for 25 minutes. Serve with bananas, raisins and fresh whipped cream.
I bet this chocolate whipped cream would be divine.
links; Tasty Tuesday, Tempt My Tummy, Traditional Tuesday, Real Food Wednesday, Works For Me Wednesday
I bet this chocolate whipped cream would be divine.
links; Tasty Tuesday, Tempt My Tummy, Traditional Tuesday, Real Food Wednesday, Works For Me Wednesday
Friday, June 17, 2011
Garden Journal 2011 {Green Beans}
Our neighbors have a huge palo verde tree on the perimeter of their yard. The branches hang over onto all three of their neighbor's property. This tree drops spider mites into my garden and cause me grief year after year. Usually it starts slowly and by July when I just can't bare to keep up the work of spraying them off, my plants become overtaken by their webbing and croak.
I planted two - eight foot rows this year, each row I planted 6 weeks apart. One mid February and the second at the beginning of April. The timing was perfect, just as the first row was petering out, the second were coming into production. I have not been bean-less in the past 3 months! In fact, I have had more than we can handle, 5 lbs a week gets to be a little much week after week. I crammed as many as I could into yummy dishes like this Garbanzo Bean Curry and my own Salmon Pasta. I gave some away, but boy was that hard after all the work that went into those babies!
After a few times of having over 5 pounds still in the fridge, going out to pick and pulling back the leaves to find a jungle of full grown beans, I decided to knock out some jars in the canner. I generally hate frozen green beans, but I am thinking that I might make a huge batch of the green bean curry and see how that freezes. Any other suggestions?
links; Fresh Bites Friday, Foodie Friday, Finer Things Friday, Fightback Friday

Wednesday, June 15, 2011
Italian Summer Over Broiled Polenta
Salsa gardens are becoming quite popular, but adding just a few more plants (zucchini, basil, oregano) expands your cuisine to cover Italian too!
I really like creamy polenta for breakfast and even more leftover, where I cut it in cubes and fry it in butter. Some stores sell the corn grit labeled "polenta," since they are virtually the same thing. Corn meal is a finer grind that will work in a pinch. I have tried soaking to unlock the B vitamins as Nourishing Traditions recommends, first in lime, then whey, but it ruins both the flavor and the texture. Any suggestions? You can buy tubes of premade polenta in health food stores if you are looking to save a step, but I prefer making it myself.
2 cups corn grits
2 cups chicken stock
1 cup milk
1 onion, chopped
1 pepper, chopped
2 garlic cloves
2 large tomatoes, diced
1 handful purslane (optional)
I really like creamy polenta for breakfast and even more leftover, where I cut it in cubes and fry it in butter. Some stores sell the corn grit labeled "polenta," since they are virtually the same thing. Corn meal is a finer grind that will work in a pinch. I have tried soaking to unlock the B vitamins as Nourishing Traditions recommends, first in lime, then whey, but it ruins both the flavor and the texture. Any suggestions? You can buy tubes of premade polenta in health food stores if you are looking to save a step, but I prefer making it myself.
2 cups corn grits
2 cups chicken stock
1 cup milk
1/2 teaspoon salt
1/4 teaspoon pepper
1 tablespoon coconut oil1 onion, chopped
1 pepper, chopped
2 teaspoons sucanat
2 medium summer squash, diced2 garlic cloves
2 large tomatoes, diced
1 handful purslane (optional)
1/2 cup fresh herbs (oregano, thyme, parsley, basil)
1 teaspoon balsamic vinegar1/2 cup fresh parmesean, shredded
2 tablespoons extra virgin olive oil
Heat chicken stock to boil, whisk in grits salt and pepper. Stir constantly. When mixture starts to thicken, add milk and continue to stir and cook until very thick and can be heaped on a spoon. Pour into 9x13 baking dish and let set up in fridge for 20 minutes or up to 3 days. Cut into 10 equal bars, carefully remove from dish onto a sheet pan and broil each side for 5 minutes or until slightly browned and crispy.
Heat coconut oil in large fry pan, add onions and peppers. Cook to soften about 5 minutes and push to the outside of the pan. Sprinkle sucanat in the center of the pan and add squash, tossing to coat in the sugar. Let caramelize on medium heat, turning once. Add garlic and tomatoes until garlic becomes fragrant and toss in purslane and herbs with a drizzle of balsamic vinegar. Plat up by placeing a scoop (about 1/2 cup) vegetables on a piece of broiled polenta, sprinkle with cheese and extra virgin olive oil.
Another polenta recipe I would like to try; Polenta Mini Pizzas
Monday, June 13, 2011
Fermenting Foods
It has been on my list of things to learn/try/implement for quite a while. This last month I have expanded into vegetables and condiments with success! I can't wait to drum up some great posts to share what I have done. Like most things, it is so simple once you have been through the process a few times.
Right now you can register for a free webinar next Monday at 10 am PST by Wardee from Gnowfglins. This webinar is all about fermented foods! If you can't make it, you can still sign up and catch the recording at your convenience.
Tuesday, May 3, 2011
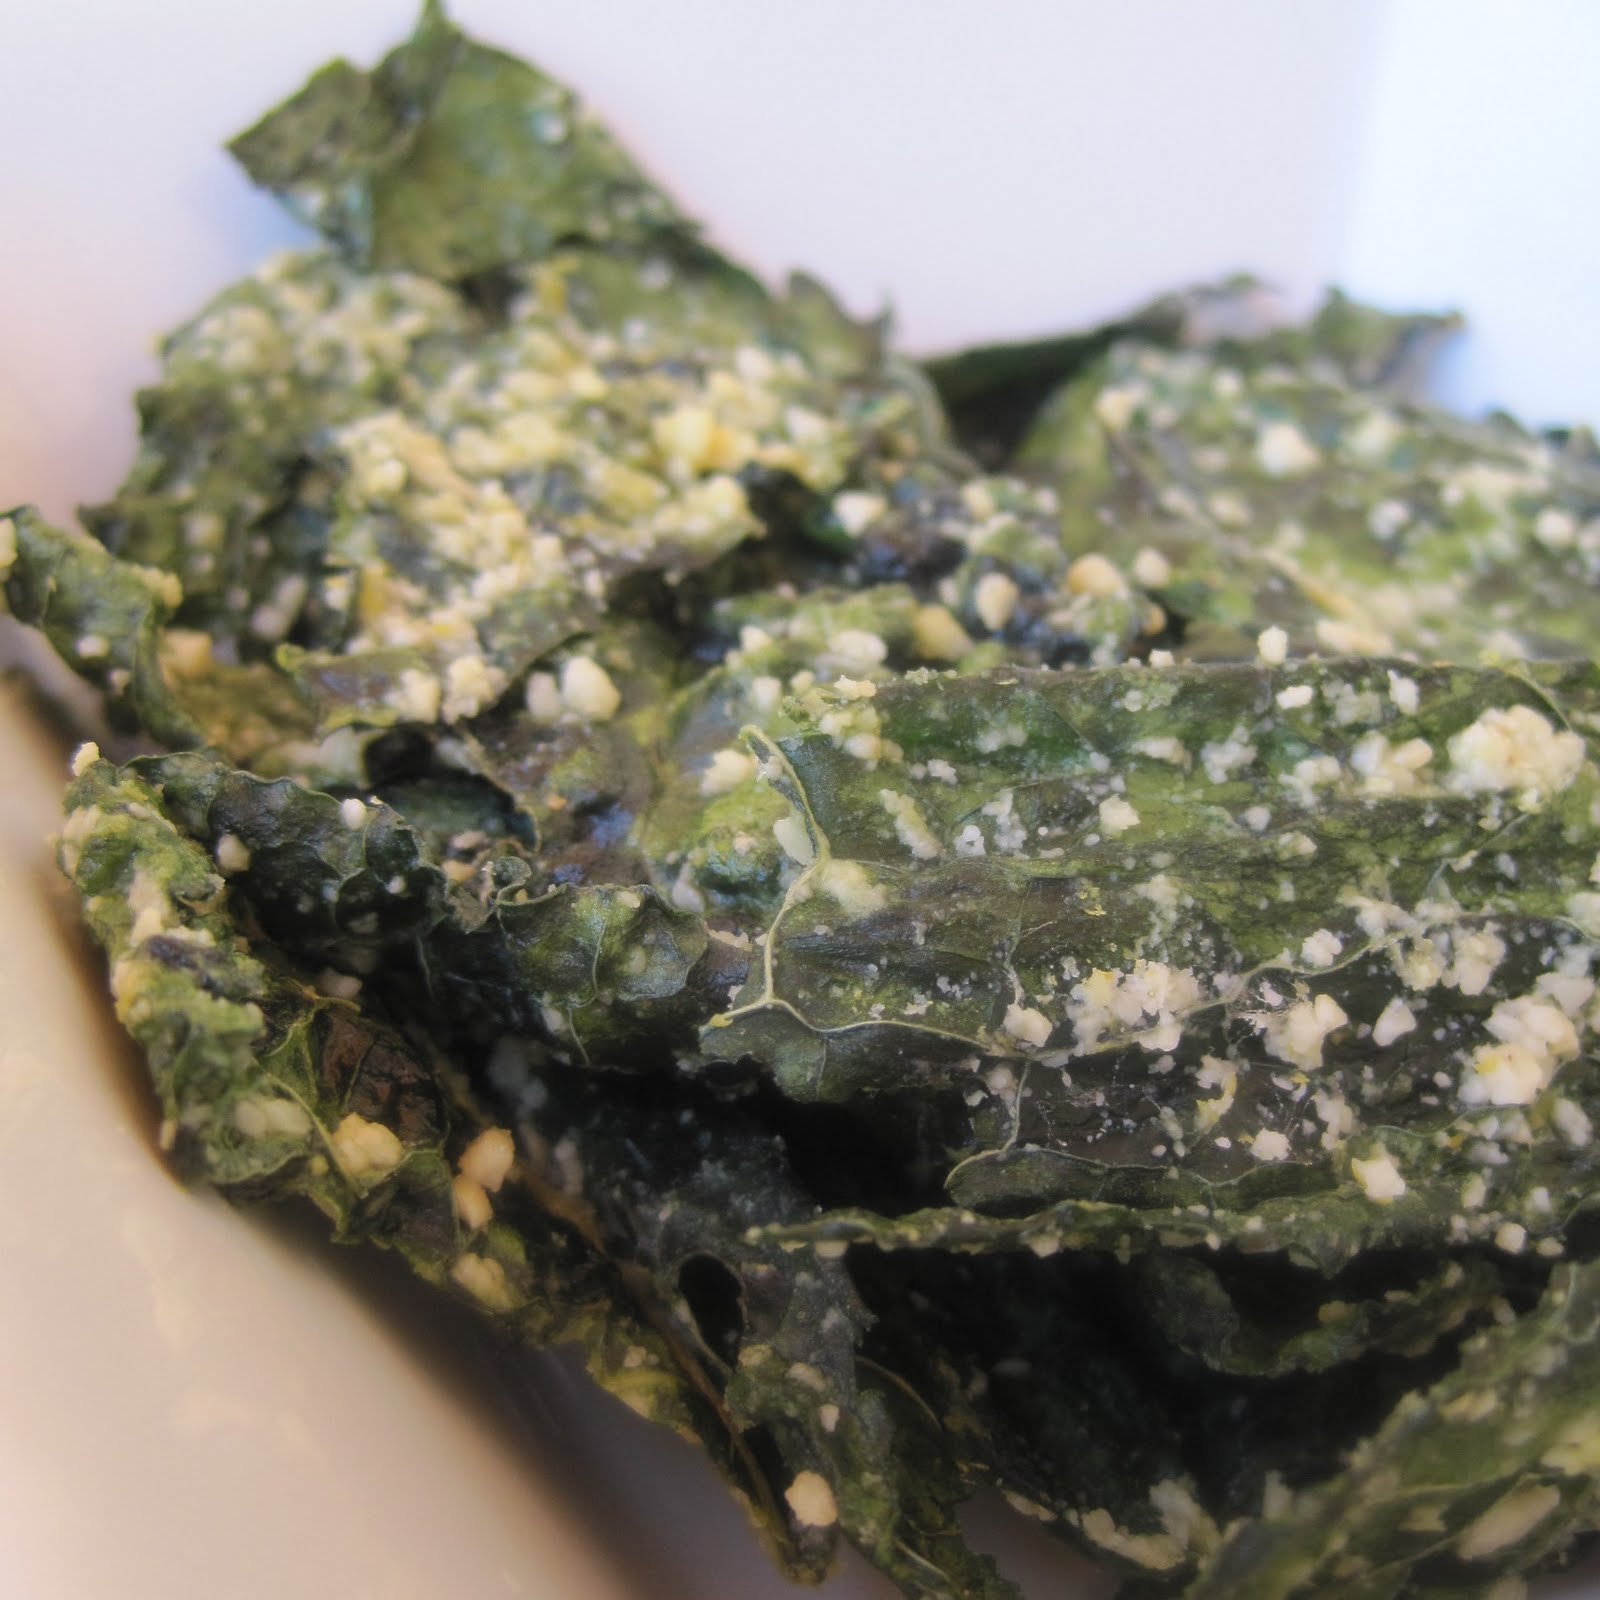
Cheesy Kale Chips
My kale chips have evolved already. We have a lot of kale still, so I have done a lot of experimenting. The simple recipe that I started out with was fine for crushing and sprinkling on pizza, sandwiches and noodles. Two of my kids actually ate them plain in large quantities, I was impressed, but there was a definite after taste that kept me from snacking.
One of my readers had mentioned a local olive mill that makes great olive oil. A few weeks after, my Backyard Farmer was offering their lovely products. I was hooked instantly and started trying my new dipping oil (a blend of extra virgin olive oil, basalmic vinegar and herbs) on everything. You know it ended up on kale and made them delicious on their own. Now all three kids downed them. I snacked some and sprinkled liberally on many plates. We went through 3 lbs of kale in a week. I was happy with making the rest of my plants this way to get them out of my garden for the season.
But a couple weeks later, at the Phoenix Farmer’s Market, we got a sample of kale chips with more substance. After checking the ingredients, I said no, thank you to the 3 ounce bag for 7 bucks and soon after pulled up a plant to get started on my own. They were an instant hit. I had to keep the kids (and myself) from eating too much at a time. Even my husband thought they were pretty good and he is an avid anti-kale person.
I used my awesome dehydrator that I got for my birthday. The first batch I did raw and the second I decided to heat to 150 degrees. The end result was hardly any different. Raw kale, although full of enzymes, can be hard on digestion and thyroid. I was reminded of this when the kids wanted me to come see what they did in the toilet. A low heat bake is a happy medium.
So, what makes these cheesy? Not cheese! I used ground raw cashews (that I soaked and dehydrated first) and nutritional yeast. At the market, they also added red pepper. The nuts stick to the kale making the chips thicker and sweeter with a cheesy tang. Love it!
2 lbs kale
1 tablespoon lemon juice
¼ cup extra virgin olive oil
½ teaspoon salt
1/3 cup raw cashews, ground
1 tablespoon nutritional yeast
Strip the kale from the tough stems, wash, dry and set aside. Make a dressing in a large bowl with the oil, lemon juice and salt. Toss kale to coat. Sprinkle with fine ground nuts and nutritional yeast. Toss again. Place kale in a single layer on dehydrator sheets or baking pan. Dehydrate for 2 hours at 150 degrees or bake for 1 hour at 200 degrees, turning halfway through cook time.
links; Hearth and Soul Hop, Tempt My Tummy Tuesday, Real Food Wednesday, Works For Me Wednesday, Encouragement is Contagious
Monday, May 2, 2011
Real Food for Rookies
If you are a newbie at all this raw, local, pastured, fermented, nourishing, real food that I talk about here on Taste is Trump, then I am about to hook you up! Kelly the Kitchen Kop is relaunching her Real Food for Rookies Class and you will love it. Taking this class will save you stress, agony and cash while you are transitioning your diet. It will save you from wasting your money on organic milk and other foods that claim to be healthy, while pointing you down the right aisles to shop. Kelly also does an amazing job at putting together research so that you get the best information, saves tons of time sifting through the internet. Tried and true recipes, entertaining and all in the comfort of your own home, in your p.j.'s. It is a beautiful thing. $190 for 12 classes. Check out her page. If you act fast, meaning TODAY, she has a special promotional price of $145 and by using the coupon code "REALFOOD" (also expires at midnight) you save an additional $25. Also, you can try winning this class by entering Cheeseslave's giveaway.
links; Monday Mania, Menu Plan Monday
Thursday, April 28, 2011
Carrot Cake Breakfast
Testing week in elementary school. I understand the need to measure learning and collect data to improve teaching methods, but I picture a room full of 7 year olds trying to concentrate on a piece of paper for more than their attention span is capable. How accurate are these results, really? Not that I could come up with a superior system. Anyway, the first grader came home from school last Friday telling me I needed to make something healthy for breakfast every day this week. With a smirk, I agreed.
My first thought was vegetables :) I had made this interesting cereal a few times before, I thought it was surprisingly good, but 2 out of 5 family members did not agree. I adapted it slightly using the ingredients for carrot cake as my inspiration and came up with a new version that we could all enjoy. Next time I think I will make it parfait style, layering the carrot mixture with the yogurt mixture. Testing, what a great excuse to try new recipes.
1 cup yogurt
1 tablespoon honey
1 teaspoon vanilla
1/8 teaspoon salt
¼ teaspoon cinnamon
¼ teaspoon cardamom
1 tablespoon chia seeds
1 ½ cup grated carrots
1/3 cup walnuts, chopped
¼ cup raisins
½ cup shredded coconut
Combine yogurt, honey, vanilla, salt, cinnamon, cardamom and chia seeds. Mix well and let set up 5 minutes (or overnight in the fridge). Toss carrots, nuts, raisins and coconut in a bowl and top with yogurt mixture.
links; Simple Lives Thursday, Pennywise Platter, Things I love Thursday, Cooking Thursday, Foodie Friday, Fightback Friday, Simple Lives Thursday, Things I Love Thursday, Frugal Friday, Finer Things Friday, Fresh Bites Friday, Recipe Swap, Sweet Tooth Friday
Monday, April 25, 2011
Herbed Smoked Salmon Yogurt Cheese Spread
Have you made yogurt cheese? It is a great way to make your yogurt thicker to any degree. Just pour into a fine cheese cloth, tie the ends, let it hang and drip into a bowl (I use a wide vase) A short drip of 2-4 hours will just give you a creamier yogurt like a Greek yogurt. 4-6 hours yields a great sour cream replacement that makes great veggie dips. To make a cream cheese consistency, you will need to drip for 6 hours, open cloth, scrape, stir and turn contents to loosen, then drip 4 more hours. For this recipe I used a cheese somewhere between sour cream and cream cheese.
4 ounces smoked salmon
1 small shallot, finely minced
¼ cup fresh herbs, minced
4 ounces yogurt cheese
¼ teaspoon salt
1/8 teaspoon pepper
Combine all ingredients in a bowl and refrigerate for 1 hour to let flavors meld. Spread on a fresh English muffin.
links; Hearth and Soul Hop, Tempt My Tummy Tuesday, Tasty Tuesday, Monday Mania, Happy Homemaker Monday, Menu Plan Monday
Subscribe to:
Posts (Atom)